Better Touch Better Business
Contact Sales at Gladman Iron Doors
Gladman Iron Doors is devoted to helping customers make hign-end and elegant fitment in their house.
info@gladmanirondoors.com

INSTALLATION
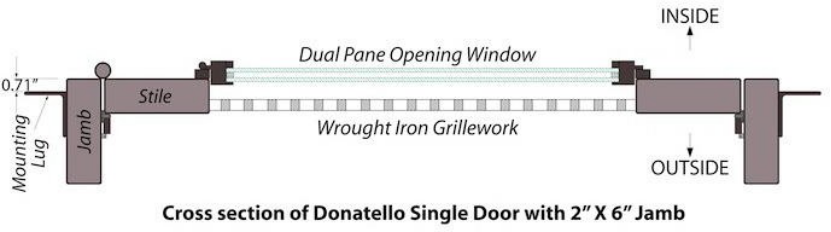
This guide is written assuming that you have a double door. However, the installation of a single door is essentially the same. Below shows a vertical cross section of a single door for reference:
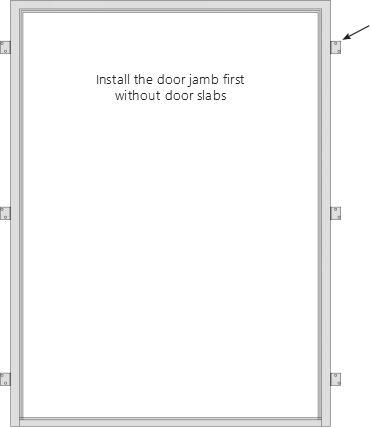
INSTALLING THE JAMB
The jamb should be installed first, without the doors, since it is comparatively lightweight and easy to maneuver into place. There are usually four lugs (and sometimes six) welded to the jamb. These will be bolted into the framing from the inside of the house using the 3 1/2” x 1/2” lag bolts.
!WARNING initially, only fasten the left and right topmost lugs to the framing. This is necessary to allow for some adjustment of the jamb later.
 Mounting Lug
HANGING THE DOORS
Remove the glass windows from the door by unfastening the latches and pulling them open so the windows can be lifted off from their hinge pins.
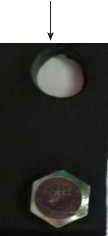
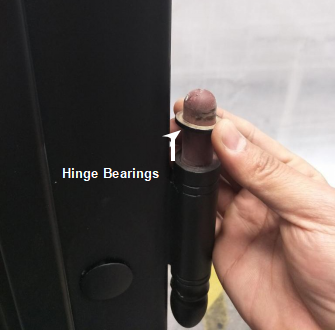
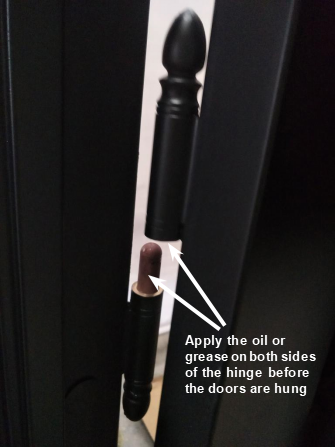
Make sure the hinge bearings are installed. The hinge bearing is a thick brass washer that must be in place on each hinge pin. The two heavy hinges should receive a VERY light application of oil or grease on both sides before the doors are hung. Do not get grease onto the painted surfaces, as this can cause damage.
Hang the Door Slabs On the Jamb
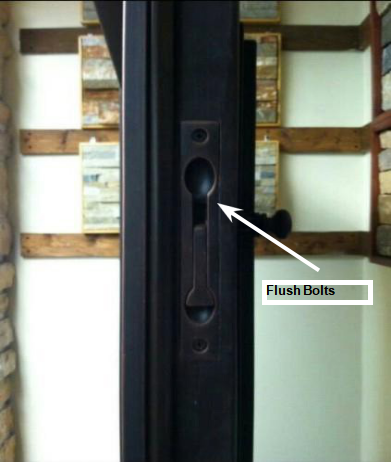
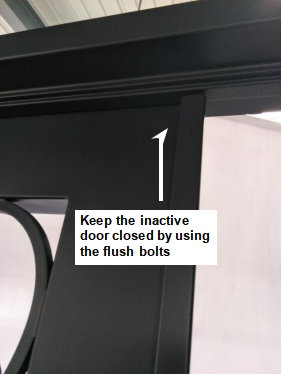
Lift each door onto its hinge pins. After the doors are hung, use the flush bolts on the edge of the inactive door to hold it closed.

INSTALLING THE JAMB
Even though you have checked the plumb of your framing, small adjustments may be needed to ensure that your doors are installed correctly.
With the doors closed, looking from inside, check that the two doors line up together in the center (look at the tops and bottoms of the two doors). If they do not, then the jamb is slightly out of alignment. You must move the bottom of the jamb to the left or right until the doors line up exactly. See the image below for an example of a door jamb out of alignment.
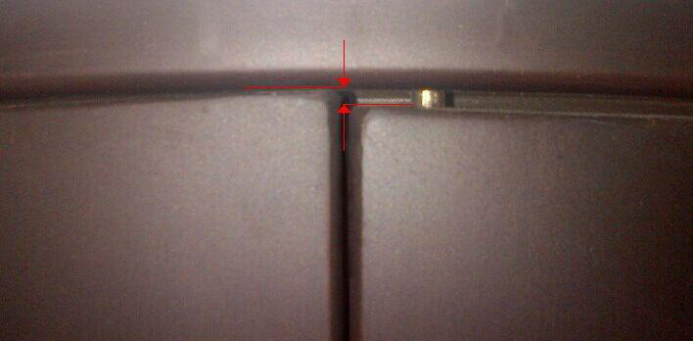
In the previous image, the bottom of the door jamb must be moved to the left slightly. The door tops and bottoms will line up perfectly in the center when the jamb is square.
Next, check that your doors close evenly from top to bottom. If, when you close your door, the top or the bottom touches the astragal first, the jamb is slightly twisted. You can adjust this by moving the appropriate lug inward (toward the inside of the house) or outward (toward the outside of the house) until the doors close evenly, top and bottom, at the same time. Once everything is adjusted correctly, secure the lower lugs in place with the lag bolts. Check the fit of the doors once again to make sure that nothing moved out of place while tightening the bolts.
INSTALL THE WINDOWS AND LOCK SET
The window hinges also have ball bearings, so the windows are simply lifted into place and latched closed. Install the lock mechanism and put the handles on the doors.
If You Have Sidelights and/or a Transom
If you have separate sidelights you will use joining bolts to fix them to the door jamb first. Apply all weather caulking between the sidelights and the jamb before joining. Once joined together, the whole unit will be bolted to the house framing as per the instructions above.
If you have a separate transom, it is mounted above the door jamb and fastened into the framework just like the door. Install the door jamb first, and then install the transom. Apply caulking to the bottom of the transom before joining it to the door jamb.
Installation is complete!
If you have additional questions, please contact Gladman Customer Support through our website at